
Modify a flow
For many new developers, the easiest way to learn how to build a flow is to begin with one of the flow templates included with Power Automate. A template includes the trigger and all of the actions needed to complete the flow’s designated tasks, although some configuration of the elements might be needed to render the flow fully operational.
Many of the Power Automate flow templates are designed to transfer data from one application or service to another. For example, the Copy files between OneDrive for Business and SharePoint template, shown in Figure 5-35, creates an automated flow that monitors a specified OneDrive folder and copies all the files saved there to a specific SharePoint folder. The flow also checks for the success of the copy operation and generates an email if it fails.
FIGURE 5-35 The Copy files between OneDrive for Business and SharePoint flow template tile
A template such as this one needs some modification before it can run. The developer must specify which OneDrive folder the trigger should monitor and choose the SharePoint site and the folder on it where the incoming files will be stored. The template detail screen, shown in Figure 5-36, includes drop-down lists in which the developer can configure the necessary fields.
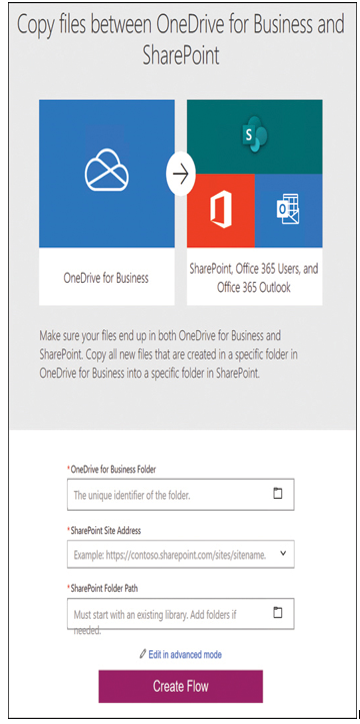
FIGURE 5-36 The Copy files between OneDrive for Business and SharePoint flow template detail screen
The template also provides a list of the connectors the flow will use, which the developer can modify to use different credentials as needed. The flow then appears in the Power Automate workspace canvas, as shown in Figure 5-37.
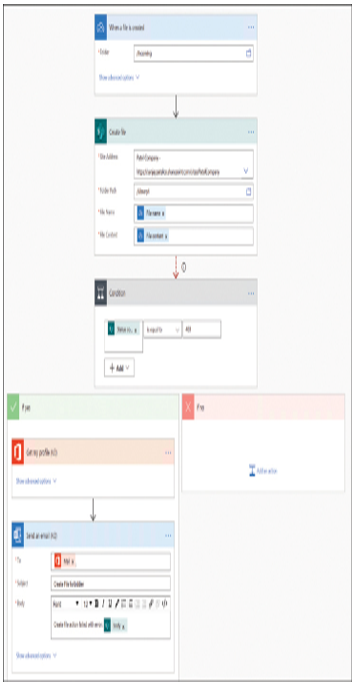
FIGURE 5-37 The workspace canvas for the Copy files between OneDrive for Business and SharePoint flow template
In this template, the flow’s trigger monitors the specified OneDrive folder and, when files appear in it, the SharePoint Create file action uses the OneDrive File name and File content values to copy the files to the specified SharePoint folder. Then, a Condition action checks the status code of the SharePoint file creation and, if the value is 403 (Forbidden), the If yes branch generates an email to the user indicating that the task has failed.
Once the workspace canvas appears with the specified OneDrive and SharePoint folders, the work of the template is complete. The trigger and actions shown on the canvas are no different than if the developer created the flow from scratch. This means that it is possible for the developer to modify the flow as needed by changing the existing actions, inserting new actions, or altering the order in which the actions are executed.