
Modifying actions
Whether created by a template or added manually, developers can always modify the configuration of a trigger or action. By default, triggers and actions use the currently logged-on user’s account to establish a connection to an application or service. Clicking the menu button in the trigger or action displays a context menu with a My connections section, as shown in Figure 5-38, in which the developer can select a different user account or add a new connection.
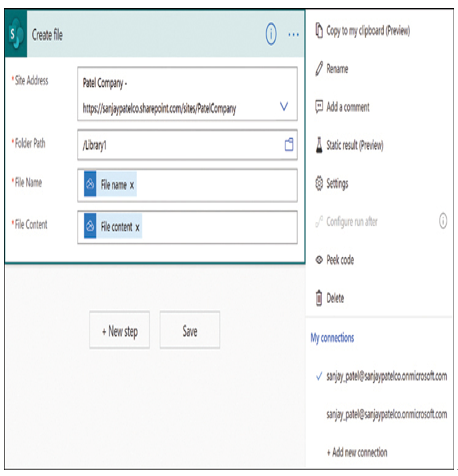
FIGURE 5-38 The context menu for a SharePoint Create file action
When the developer changes the connection to use a different account, the drop-down lists and the Dynamic content fields for the action change as well. In this example, the Site address and Folder path fields have drop-down lists that provide access to the current user’s SharePoint environment. Changing the user address for the connection changes the contents of the drop-down lists. The File name and File content values are dynamic content fields that reference the OneDrive connection established in the trigger, so changing the connection in the trigger above changes the fields available in the Dynamic content pop-up.
Inserting actions
Developers can add actions to a flow in multiple ways. The Power Automate workspace canvas always includes a +New step button at the bottom, which opens the Choose an action dialog box. Selecting an action from the dialog box adds it to the bottom of the flow. The arrows pointing down from the trigger to the first action and from one action to another display a plus sign when the cursor hovers over them, allowing a developer to insert an action between two existing steps. Clicking the plus sign displays a menu with two options:
■ Add an action—Opens the Choose an action dialog box, in which the developer can select an action to be inserted between the existing steps
■ Add a parallel branch—Opens the Choose an action dialog box in a separate branch off of the step above, as shown in Figure 5-39. This allows the flow to perform two separate actions at the same time, both using the results of the same previous step.
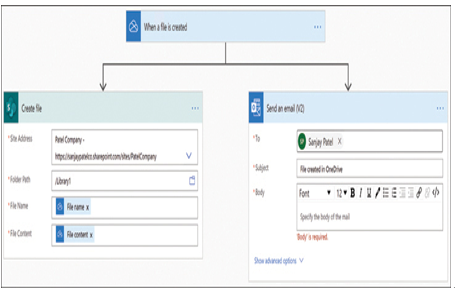
FIGURE 5-39 Two actions in a parallel branch off of a single trigger
Note Dragging and Dropping Actions
The trigger step always appears at the top of a flow, with one or more action steps beneath it. When a flow runs, it executes the steps from top to bottom. The workspace canvas uses down-pointing arrows to indicate the progression between steps. When editing a flow, however, the developer can modify the progression of the steps by dragging and dropping actions up or down as needed. This alters the order in which the running flow processes the actions.