
Using the Power Automate workspace canvas
After the developer has configured the trigger for an automated, instant, or scheduled flow in the Power Automate portal, the workspace canvas for the flow appears, as shown in Figure 5-28. In this example, an automated flow is triggered each time a new email arrives at the user’s Outlook 365 Inbox. By default, the trigger uses the account of the user that is currently logged on, although it is possible to create a new connection to a different email address, if desired.

FIGURE 5-28 A trigger in a Power Automate flow
With the trigger in place, the developer can then click the New step button to open the Choose an action dialog box, as shown in Figure 5-29. Power Automate provides hundreds of actions that developers can use to manage the incoming email messages. For example, Control actions can evaluate the email messages and take action on what they find. Notification actions can inform the user when certain types of emails arrive. This example will use both of these action types.
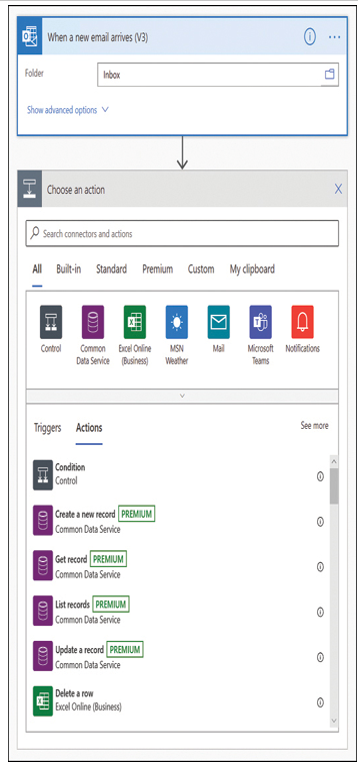
FIGURE 5-29 The Choose an action dialog box in a Power Automate flow
Selecting the Condition action adds three boxes to the workspace canvas, as shown in Figure 5-30: the Condition box and, branching from that, an If yes and an If no box.
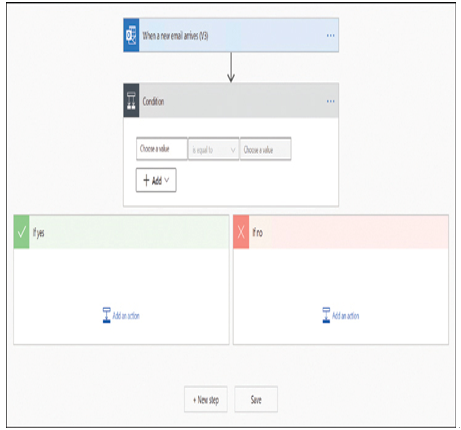
FIGURE 5-30 A Condition action in a Power Automate flow
In the Condition box, the developer creates an if/then statement that can examine some part of the incoming email. Clicking in the Choose a value text box opens the Dynamic content pop-up, as shown in Figure 5-31, which lists the various fields in an email.

FIGURE 5-31 The Dynamic content pop-up in a Power Automate flow
The Condition box can test the value of any field in the email and return a Yes or No response. For example, after selecting the Importance field, the developer can type one of the acceptable values for that field in the Choose a value box. In this example, the condition being tested is whether Importance is equal to high, as shown in Figure 5-32. In the same way, the developer could use the Condition box to test whether the From field contains the name of a specific person or the Subject field contains a specific text string.
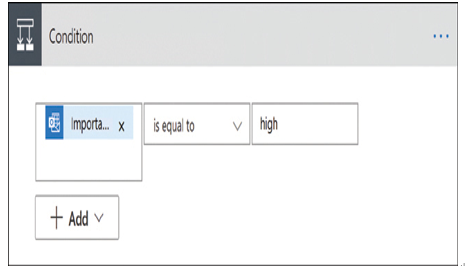
FIGURE 5-32 A Condition equation in a Power Automate flow
The If yes and If no boxes take action based on the results of the equation in the Condition box. If an email is set to have high importance, the Condition result is yes, and the flow executes any actions in the If yes box.
Clicking Add an action in the If yes box opens the same Choose an action dialog box shown earlier. In this example, high importance emails cause the flow to execute the Send me a mobile notification action, as shown in Figure 5-33. The developer can type any message in the Text box and include values from fields selected in the Dynamic content pop-up. In this case, the notification will specify the sender of the email.
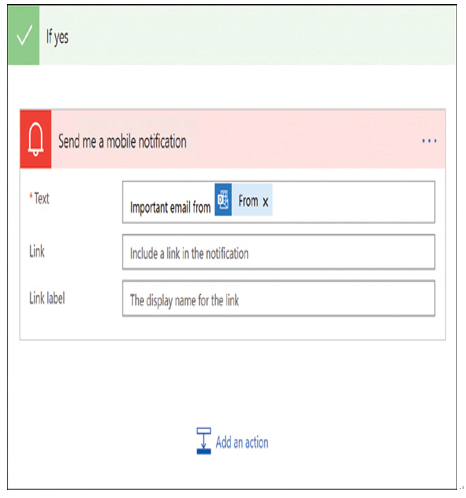
FIGURE 5-33 A Send me a mobile notification action in the If yes box in a Power Automate flow
The developer can create additional actions in the If yes box, if desired, such as an action that stores the email in a SharePoint site or copies any attachments to the user’s OneDrive. The If no box can contain actions also, or be left blank, as needed.
Once the flow is complete, the developer should click Save to make sure that the flow is added to the user’s My flows list, as shown in Figure 5-34.
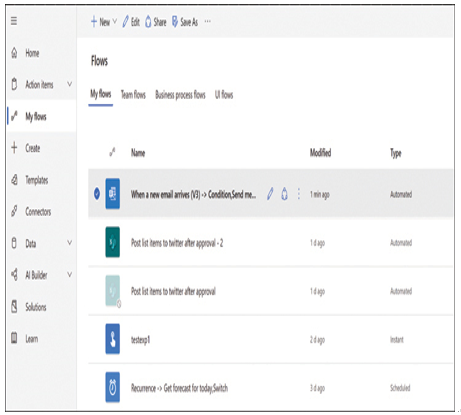
FIGURE 5-34 A new flow in the My flows list in Power Automate